Okay folks, let’s dive into the world of overclocking! If you’re anything like me, you always look for ways to get the most out of your computer. That’s where overclocking comes in – it’s a way to push your computer’s capabilities beyond its factory settings. So, what is overclocking? Simply put, it’s the act of increasing the clock speed of your computer’s components – think of it as tuning a car’s engine to make it go faster! But why bother with overclocking? Well, it can give you increased performance and speed, making it a great option for gamers, video editors, and other power users.
In this step-by-step guide, we’ll walk you through the process of getting your computer to run faster than ever before. But before you get started, it’s important to understand the risks involved. Overclocking can potentially damage your computer’s parts or void your warranty, so proceed with caution!
Don’t worry though, if you follow our guide carefully, you’ll be able to overclock your computer safely and effectively. So buckle up and get ready to supercharge your machine!
Step 1: Ample Knowledge of Your Computer’s Capabilities Is Essential
Before indulging in overclocking, it is essential to understand your computer’s capabilities to determine the right overclocking settings. Identifying each component that needs to be overclocked can be challenging, but it is a crucial step. Getting a general idea of your computer’s existing clock speeds can help you determine what level of overclocking you need without causing damage to your hardware.
Overclocking a CPU, for instance, requires software that is compatible with the motherboard and processor. Be sure to research the manufacturer’s website and analyze benchmark results for your specific hardware to determine the appropriate overclocking settings.
Choosing the correct overclocking settings for your computer can influence its stability, performance, and overall functionality. Make sure to factor in the operating voltage of each component and choose a safe overclocking setting. Generally, those who want less risk would try to maintain their graphics card and CPU’s overclocked speeds below 10%.
Once you’ve identified these aspects of your computer, you can proceed to step two of the process.
Let’s Get Software: Step 2 of the Ultimate Overclocking Guide
Now that I have a good grasp of my computer’s capabilities and have chosen the appropriate overclocking settings, it’s time to move on to the next step: installing the necessary software. Without the proper software, I won’t be able to adjust my CPU and GPU settings, monitor my system temperatures or measure my overclocking success.
First things first, I need to determine which software is appropriate for my particular system. There are several overclocking software options available, such as MSI Afterburner, EVGA Precision X1, and Asus GPU Tweak II. I should choose the software that best suits my needs and my hardware specifications, and that is compatible with my operating system. It’s important to do my research beforehand to make sure I am downloading a reliable program from a reputable source.
Once I have identified the appropriate software, I will need to download and install it on my computer. The installation process will be similar to that of any other program. I will select the destination folder, agree to the installation terms, and follow the prompts until the software is installed on my system.
It’s important to note that some software may require additional components, such as drivers, to run properly. In such cases, it’s important to install any required components and update them as needed to ensure my overclocking software runs smoothly.
With my overclocking software installed and ready to go, I can move on to the next step of the ultimate overclocking guide: making system adjustments.
Step 3: Time to Make Some Tweaks!
Alrighty, here we are at step three. This is where the magic happens – we’re going to make the adjustments to get our system running at maximum capacity. But before we start tweaking, we need to pay attention to a couple of things.
Monitor Those Temperatures
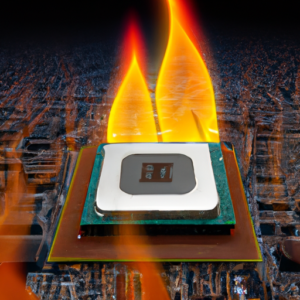
First up, temperature. It’s important to keep an eye on the temperature of your components, as overclocking can cause an increase in heat. To monitor this, I recommend using a tool like HWMonitor. Keep an eye on the temperature while you adjust clock speeds.
Increase Clock Speeds
Now, we can start finding the perfect overclocking settings for our computer. We’ll start by increasing the clock speeds of our components. When increasing the clock speed of your CPU, you’ll usually adjust the multiplier found in the BIOS. Make small incremental changes and test for stability (see the next step), rather than jumping up to the maximum right away. The same principle applies to GPU overclocking.
Stress Test to Ensure Stability
It’s important to stress test your system after each change to ensure stability. Stability tests, like Prime 95, help to ensure that your overclocked system is still stable under increased loads, and will help identify any instabilities. Keep a close eye on temperatures during this step. Adjust and retest, adjusting and retesting, until you find the perfect balance between stability and performance.
Remember, overclocking can void your warranties and, if done improperly, can damage your system. Be cautious and monitor your temperatures and performance!
Step 4: Monitor Performance
Alright, so you’ve successfully overclocked your computer, but now what? It’s time to monitor its performance to make sure everything is running smoothly. This step is important because it allows you to keep an eye on temperatures and make sure your system isn’t overheating.
First things first, you’ll want to continue monitoring temperatures to ensure they stay within safe limits. Overclocking can cause your computer to run hotter than usual, which can potentially damage your components if left unchecked.
Next, you’ll want to monitor your performance to make sure you’re getting the most out of your overclocked system. Some good metrics to keep an eye on include benchmark scores, frame rates in games, and general system responsiveness. If you notice any issues with performance, it may be necessary to adjust your overclocking settings to find a better balance between performance and stability.
It’s also worth noting that you should continue stress testing your system periodically during this step. Over time, your overclocking settings may become less stable due to wear and tear on your components, so it’s important to make sure everything is still working as it should.
Overall, monitoring your system’s performance is a crucial part of the overclocking process. By keeping an eye on temperatures and performance metrics, you can ensure that your system is running at its best and make any necessary adjustments along the way.
Conclusion: Wrapping Up My Overclocking Journey!
Well, folks, there you have it! A complete guide to overclocking your computer. It was quite a journey, but I hope I was able to make everything clear and concise for you.
What did we learn? Overclocking is the act of increasing a computer’s clock speed to improve its performance. It can provide benefits such as faster processing speeds and better multitasking capabilities. However, it does come with its risks, such as high temperatures and decreased hardware lifespan.
Before embarking on any overclocking adventures, it’s crucial to understand your computer’s capabilities and choose appropriate settings. Installing necessary software is also essential, as it allows you to monitor and adjust your system as needed. Making system adjustments and stress testing your computer are steps necessary in the overclocking process.
Once you’ve successfully overclocked your computer, it’s vital to monitor its performance and temperatures regularly. Overclocking can push your system to its limits, so keeping an eye on potential issues can prevent any damage.
In conclusion, I hope this guide has helped you in your overclocking journey. Just remember, overclocking is not for everyone, and it comes with its risks. But if done correctly, it can provide significant performance improvements.