Let’s Get Started: A Beginner’s Guide to Network Attached Storage
Hey there! If you’re reading this, then I’m betting you’re considering installing a Network Attached Storage (NAS) device in your home or office network. Well, you’ve come to the right place!
In simple terms, a Network Attached Storage device is like having your own personal cloud storage that’s directly connected to your network, allowing you to access your files and data from any connected device. So, whether you’re a small business owner, a media enthusiast or simply looking for a secure way to store your files, NAS is definitely worth considering.
So, let’s dive in and explore the benefits of NAS and what you’ll need to consider before installing one.
So, you want to install a Network Attached Storage, huh? Well hold on, here are a few things you’ll need:
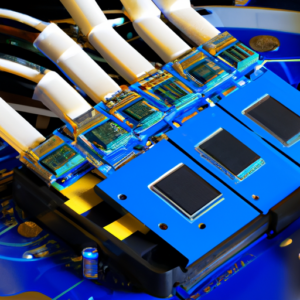
First off, let’s talk hardware and software. While NAS devices come in many shapes and sizes, they all require some sort of storage medium and processing power. So, when considering the hardware for your NAS, make sure you have ample storage space and a processor that can handle the load. As for software, most NAS devices come with their own proprietary software, so it’s important to choose a device that supports the applications and services you require.
Next, you need to understand your network topology. This means identifying your network’s components, such as routers, switches, and cabling, and knowing how they’re all connected. If you’re not sure how to do this, don’t worry, there are plenty of online resources to guide you. However, keep in mind that the more complex your network, the more difficult it may be to install your NAS device.
Now, let’s get into the nitty-gritty of installing your NAS. It’s important to prepare the device prior to installation, by setting it up according to the manufacturer’s instructions. This may involve installing any required hardware components and installing software updates. Once you’ve done this, you can connect the device to your network using an ethernet cable. The device should automatically obtain an IP address from your router.
After the device is connected, you’ll need to configure it. This usually involves accessing the device’s web interface and setting up user accounts, creating shared folders, and applying any necessary security or access controls. Once this is complete, you can access your NAS device from any computer or device connected to your network.
And, that’s it! As you can see, there are a few prerequisites to installing a Network Attached Storage, but with a bit of preparation, it’s a relatively painless process.
Step-by-Step Guide to Installing Network Attached Storage
Alrighty, let’s get started on setting up your Network Attached Storage (NAS) device! First off, make sure you have all the necessary hardware and software. You’ll need a NAS device, a router or switch, Ethernet cables, a computer or mobile device, and the manufacturer’s software or web interface.
Once you have your materials, it’s important to understand the topology of your network. Where is your router located? What IP addresses are being used by your devices? Knowing your network topology is crucial for setting up your NAS device correctly.
Now onto the installation process. Start by preparing your NAS device according to manufacturer’s instructions. It’s important to settle on a location for the device that’s easily accessible, but also secure. Once you’ve installed any hard drives and plugged in the power cord, use the Ethernet cable to connect the device to your router or switch.
Next, configure the device using the software provided by the manufacturer (or through a web interface). You’ll need to do things like set up a password, assign IP address, configure user access controls, and more. It’s important to follow the manufacturer’s instructions closely here since the configuration process can vary depending on the specific brand and model.
Finally, you’re ready to access your new NAS device! Using your computer or mobile device, connect to the NAS interface using the IP address you assigned earlier. This will allow you to manage, upload, and download files to the device. Congrats, you’re now ready to enjoy the benefits of Network Attached Storage!
Conclusion: Wrapping Up My NAS Device Installation Experience, Here’s What I Learned!
Installing a network attached storage (NAS) device can be a worthwhile investment to keep all of your data organized, accessible, and secure. Throughout this process, I’ve learned that it requires some time and effort, but is overall straightforward if you have the right knowledge, tools, and a clear understanding of your network topology.
When considering the benefits of having a NAS device, I realized that it’s not just about having extra storage space, but also about having the ability to access files from any device connected to the network, the ability to back up important data, and the flexibility to stream media or run applications.
Before starting the installation process, it is crucial to ensure the necessary hardware and software are available, and that you understand the layout of your network. This will help you to choose the best NAS device to fit your needs and to have a clear idea of where to place it in your network topology to maximize performance and efficiency.
My step-by-step guide to installing a NAS device highlights the importance of preparing the device, connecting it to the network, configuring it, and accessing it through various devices. Throughout this process, it is important to take the time to read the instructions carefully and to be patient while waiting for the configuration settings to take effect.
Overall, my NAS device installation experience has been positive, and I’ve learned that it is an excellent investment that can help protect and store all of your important data while giving you the convenience and flexibility to access it from anywhere. So why not give it a try?